
Finding the best backpacking tent for beginners can feel like trying to decipher a foreign language, especially when you are suddenly hit with terms like hydrostatic head, silnylon, and semi-freestanding structures. When you are just starting out on the trail, the gear choices you make will dictate whether your first trip is an absolute success or a cold, wet learning experience. You do not need to spend your entire paycheck on specialized ultralight gear right out of the gate. What you need is a reliable, structurally sound shelter that forgives novice mistakes and keeps you dry when the weather inevitably turns.
Quick Summary
Structure is everything: Novices should exclusively look for freestanding, double-wall tents to eliminate the steep learning curve of advanced pitch systems.
Size up for comfort: Always buy a 2-person tent if you are hiking solo. A standard 1-person tent leaves zero room for your gear.
Watch the weight: Aim for a packed weight of 4.5 to 5.5 pounds for a beginner 2-person tent.
Aluminum over fiberglass: Never buy a backpacking shelter with fiberglass poles. They splinter under stress and add unnecessary bulk.
Expect to spend $150 to $250: This is the sweet spot for an entry-level shelter that balances durability, weather protection, and acceptable trail weight.
The Direct Answer: What Should You Buy Right Now?
If you want the straightforward answer without getting bogged down in endless outdoor industry jargon, here is exactly what you should purchase for your first few overnight trips.
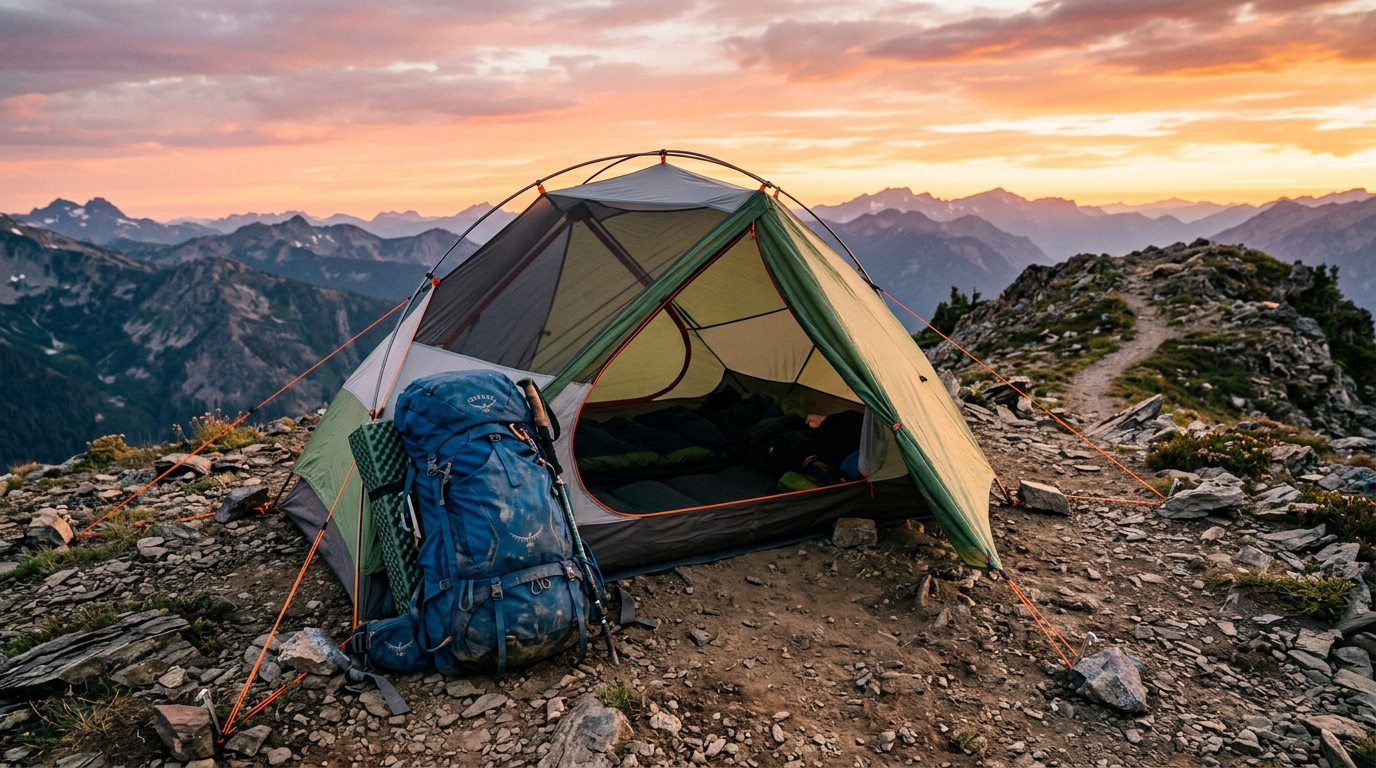
Look for a freestanding, two-person, double-wall tent with aluminum poles that weighs around 4.5 to 5.5 pounds.
You want a tent that utilizes an “X” pole configuration or a simple hubbed pole system. This design allows the inner mesh body of the tent to stand up completely on its own before you throw the waterproof rainfly over it. Look for a model with two doors and two vestibules (the covered porch areas outside the doors). This ensures you do not have to crawl over your gear—or your hiking partner—in the middle of the night.
Do not try to cut weight by buying a single-wall tent, and absolutely avoid anything that requires you to use your own hiking poles to hold it up. Stick to established outdoor brands like REI, Kelty, or Marmot rather than ultra-cheap hypermarket brands, as the waterproofing on the latter rarely holds up past a heavy drizzle.
Understanding the Triangle: Weight, Durability, and Price
In the backpacking world, there is an unavoidable law of physics and economics often referred to as the Golden Triangle. The three points of this triangle are: Lightweight, Durable, and Cheap. You can only ever pick two.
The Heavy and Cheap Route
If you pick Durable and Cheap, your shelter is going to be heavy. These are the tents you find at massive retail stores for $40. They use heavy polyurethane coatings, thick fiberglass poles, and bulky zippers. They might survive a storm, but at 7 or 8 pounds, hauling one up a 2,000-foot elevation gain will make your knees scream. I tried hiking with an 8-pound dome tent on a moderate trail in Pennsylvania once. The sheer volume of the packed material meant I had to strap it awkwardly to the outside of my bag, throwing my balance completely off for ten miles.
The Ultralight and Expensive Route
If you pick Lightweight and Durable, your tent is going to be extremely expensive. These are the premium shelters made from Dyneema Composite Fabric or high-end silnylon. They weigh under two pounds and cost upward of $600 to $800. For someone just learning the ropes, this is a massive and unnecessary financial commitment. Furthermore, these ultralight materials, while strong against tearing, have incredibly thin floors. They are highly susceptible to punctures from stray twigs or sharp rocks if you do not know how to clear your campsite properly.
The Beginner Sweet Spot
Your first tent should sit comfortably in the middle of this triangle. You want standard ripstop polyester or nylon (usually around 68-denier thickness). You want basic DAC aluminum poles. This combination gives you a setup that weighs about 5 pounds, costs around $200, and is tough enough to withstand an accidental boot scrape.
The “Two-Person” Lie: Deciphering Tent Sizes
One of the most frustrating aspects of the outdoor industry is how they categorize capacities. You might assume a 1-person tent is perfect for one person. This is technically true only if you sleep perfectly still and do not mind leaving your expensive backpack out in the rain.
The Size-Up Rule for Solo Backpackers
Industry standards base tent capacity on the width of a standard sleeping pad, which is about 20 inches wide. A typical 2-person tent has a floor width of around 50 inches. This means if you put two pads side-by-side, you have exactly 10 inches of spare room.
Even for smaller hikers, a 1-person tent is incredibly restrictive. At 5’5″, I found that once my sleep system was set up inside a 1-person tent, there was virtually no room left for my backpack or muddy shoes, nor was there adequate room to sit up and change clothes.
If you are a solo backpacker, a 2-person tent is the ideal choice. The 50-inch width gives you enough room to lay out your sleeping pad, keep your delicate gear inside the tent with you, and actually stretch out. The weight penalty between a 1-person and 2-person tent is usually just 8 to 12 ounces—a completely worthwhile trade for double the livable space.
Sizing for Couples
If you are backpacking with a partner or a large dog, do not buy a 2-person tent. Apply the size-up rule and upgrade to a 3-person tent. That extra 20 inches of width will save your relationship when you are trapped inside during a 14-hour summer rainstorm. You need space to play cards, organize your food bags, and sleep without constantly bumping into each other.
Why Freestanding is the Only Way to Go for Novices
When shopping, you will see shelters categorized primarily as freestanding, semi-freestanding, or trekking pole tents. Your physical environment should dictate your structural style, but beginners should almost always start with freestanding.
The Freestanding Advantage
Freestanding tents come with a dedicated pole system that creates a complete skeleton. Once you clip the inner tent to the poles, you can physically pick the entire structure up, turn it upside down to shake the dirt out, and move it around your campsite until you find the perfectly flat spot.
They do not rely on stakes to maintain their structural integrity. If you end up camping on solid granite, wooden platforms, or hard-packed sand where stakes will not penetrate, a freestanding tent will still stand up perfectly.
The Danger of Trekking Pole Tents for Beginners
Trekking pole tents require you to securely anchor several stakes into the ground at precise angles, using your walking poles as vertical supports. If one stake pulls out of loose soil during the night, the entire shelter collapses on top of you.
When I first tried a trekking pole tent to save weight, I spent 45 minutes in the fading twilight desperately trying to get the tension right on a rocky slope in the Sierras. Because the ground was too hard for stakes, I ended up having to tie my guylines to heavy boulders just to sleep. Beginners should avoid this stress entirely.
Weather Resistance and Managing the Elements
Your shelter has one fundamental job: keeping you dry. But dryness comes from two different directions—the sky above you, and your own lungs inside the tent.
Three-Season vs. Four-Season
Tents are explicitly categorized by the seasons they are built to endure. Beginners should exclusively look for 3-season tents. Designed for spring, summer, and fall, they utilize lightweight fabrics and feature extensive mesh panels for ventilation.
Do not buy a 4-season tent thinking it will just be “extra waterproof.” Four-season tents are designed for harsh winter mountaineering. They lack mesh ventilation, making them suffocatingly hot in the summer, and they weigh significantly more due to heavy-duty poles designed to withstand heavy snow accumulation.
The Curse of Condensation
Novices often mistake condensation for a leaking rainfly. When you sleep, you exhale nearly half a liter of moisture into the air. If the outside air is cold, that moisture hits the relatively warm inside of your rainfly and turns into water droplets.
This is why a double-wall tent is critical. A double-wall design features a breathable mesh inner body and a waterproof outer rainfly. The condensation forms on the inside of the outer fly, completely separated from you by the mesh inner. Single-wall tents lack this barrier, meaning any condensation immediately drips directly onto your sleeping bag.
Cost and Value Breakdown
Understanding what you actually get for your money will prevent you from overspending on features you do not need yet. Here is a realistic look at the current market tiers for a 2-person shelter.
| Price Tier | Expected Weight | Materials Used | Best Fit For |
|---|---|---|---|
| Budget ($130 – $170) | 5.5 – 7.0 lbs | Heavy polyester, thick aluminum poles. | Weekend warriors, short hikes under 5 miles, car camping crossovers. |
| Mid-Range ($200 – $300) | 4.5 – 5.5 lbs | 68D Ripstop nylon, DAC aluminum poles. | The vast majority of beginners. Offers the best balance of trail weight and durability. |
| Premium ($400 – $600+) | 2.0 – 3.5 lbs | 15D Silnylon or proprietary lightweight fabrics (e.g., OSMO). | Experienced long-distance hikers counting every single ounce on 100+ mile trips. |
For most beginners, the Mid-Range tier provides exceptional value. Tents in this bracket will easily last 5 to 10 years if you take care of them, dry them properly after trips, and store them loosely.
Top Beginner Backpacking Tent Recommendations for 2025
Based on current market data and extensive field testing, these are the standout options for anyone looking to purchase their first shelter.
1. The Best Mid-Range Option: REI Co-Op Trail Hut 2
Replacing the legendary Half Dome series, the Trail Hut 2 is a functional, practically bombproof tent.
Price: ~$229.00
Weight: 4 lbs. 14 oz.
The Verdict: It features heavy-duty nylon taffeta making it highly durable and budget-friendly. It includes two doors and two vestibules. While it sits on the heavier side of the acceptable weight spectrum, its low price point and robust materials make it the perfect entry-level choice.
2. The Best Premium Upgrade: Big Agnes Copper Spur UL2
If you have a higher budget and want a tent that you will never need to upgrade, this is the gold standard.
Price: ~$549.95
Weight: 3 lbs. 0 oz.
The Verdict: It strikes the absolute best balance between low weight, spaciousness, and ease of use. The 2025 models utilize a proprietary fabric claimed to be 50% stronger than traditional fabrics without adding weight. The awning-style vestibules provide incredible gear storage.
3. The Best Budget Option: Kelty Late Start 2
If you are truly strapped for cash but still want to hit the trail safely, Kelty provides reliable entry-level gear.
Price: ~$160.00
Weight: ~4 lbs. 4 oz.
The Verdict: It is highly durable and very roomy. The main downside is that it only features a single door, meaning if you share it with a partner, someone is getting crawled over in the middle of the night.
Who Should Choose Which Tent (And Who Should Not)
Choosing the right gear depends entirely on what kind of hiker you plan to be. Use these explicit decision rules to guide your purchase.
This classic freestanding, 2-person tent approach is ideal for:
You are hiking solo but want room to store your pack inside.
You plan to camp on varied terrain like wooden shelter platforms, rocky outcrops, or soft sand.
You want a tent you can pitch in under five minutes in the dark.
You want a shelter that can double as a comfortable car-camping tent for weekend festivals.
You might want to skip this approach if:
You are an experienced hiker transitioning to long-distance trails (like the Appalachian Trail) where saving every ounce is critical. Look into ultralight trekking pole tents instead.
You only plan to drive to your campsite and park your car right next to your fire pit. In this case, buy a massive 4-person cabin tent. Backpacking tents are deliberately small to save weight; do not subject yourself to a tiny shelter if you do not have to carry it.
Common Mistakes to Avoid
Even with the perfect gear, human error can ruin a trip. These are the most common pitfalls I see beginners make with their new shelters.
Mistake 1: Skipping the Footprint
A footprint is a custom-cut piece of durable material that goes directly under your tent to protect the delicate floor from sharp rocks, pine needles, and mud. Many beginners skip buying the footprint to save $30. This is a massive mistake.
The floor of a lightweight tent is incredibly thin. One sharp piece of gravel will puncture it, allowing groundwater to soak your sleeping pad. If you do not want to buy the official brand-name footprint, go to a hardware store, buy a sheet of Tyvek, and cut it to size. It costs $10 and will save your $250 investment.
Mistake 2: Storing the Tent Wet
This is the fastest way to destroy your gear. If you pack up your tent while it is wet with morning dew or rain, and leave it compressed in its stuff sack in your hot closet for a week, it will develop irreversible mildew.
The polyurethane waterproof coating will begin to peel off in sticky, foul-smelling flakes—a process known as delamination. The moment you get home from a trip, set the tent up in your backyard or drape it over your shower curtain rod until it is bone dry.
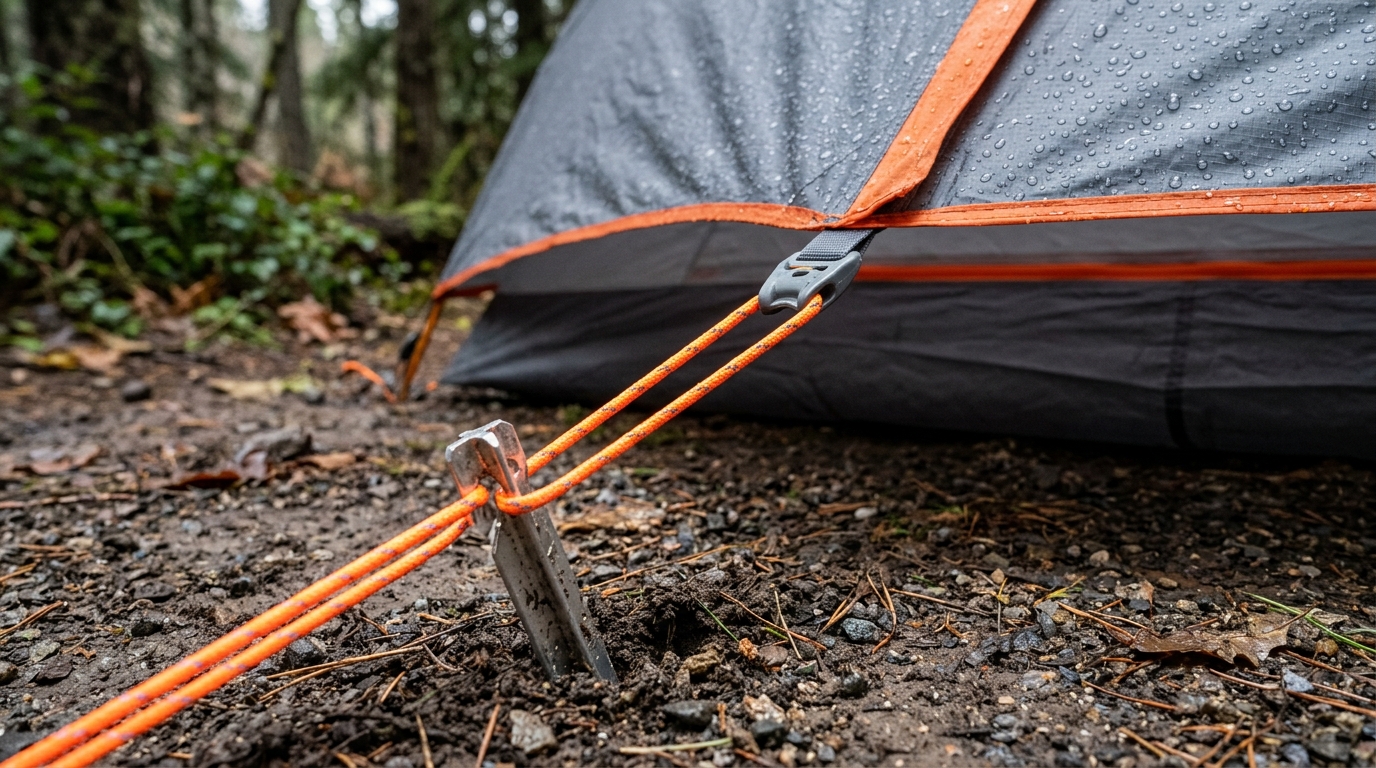
Mistake 3: Failing to Guy Out the Rainfly
Your tent comes with extra strings attached to the rainfly called guylines. Beginners often snap the poles together, throw the fly over, stake the four corners, and call it a day. When it rains, the loose, flappy fabric sags, touches the inner mesh, and transfers water directly into the tent.
The crisp, drum-tight pitch you see in marketing photos is achieved by staking out every single guyline. Take the extra three minutes to do this—especially if wind is in the forecast. It significantly drastically improves ventilation and keeps you dry.
First-Hand Field Tips for Tent Care and Packing
Beyond just buying the right shelter, knowing how to handle it on the trail makes your life much easier.
Keep it Clean: Never wear your hiking boots inside the tent. Brush off clothing before entering. Before packing up in the morning, physically pick the freestanding tent up by the poles and shake the loose dirt and dead bugs out of the open doors.
Pack Smart: Separate your tent poles from the fabric. Slide the rigid poles down the side of your backpack vertically. Then, stuff the fabric into a compression sack at the bottom of your bag. This utilizes your internal backpack space much more efficiently than trying to pack the long, bulky cylinder the tent originally came in.
- Splinting Broken Poles: Always carry the small, hollow metal tube included with most tents (the pole repair splint). If a sudden gust of wind snaps an aluminum pole, slide the tube over the break, center it, and wrap the ends tightly with duct tape. This quick fix will save your entire trip.
- madelinemarquardt.com
- www.outdoordetour.com
- www.hikeoregon.net
- wildlandtrekking.com
Frequently Asked Questions
Do I really need a 4-season tent for winter camping?
If you are planning to camp in deep snow or extreme alpine conditions with heavy wind loads, yes. 4-season tents are designed with rigid, overlapping pole structures to withstand heavy snow accumulation. However, for 95% of beginners camping in spring, summer, and fall, a standard 3-season tent is perfectly fine.
How long should a good backpacking tent last?
If you invest in a quality mid-range tent (around $200-$300), use a protective footprint, and never store it wet, it should comfortably last 50 to 100 nights on the trail. The first things to fail are usually the elastic shock cords inside the poles, which naturally lose elasticity over time but can easily be replaced at home for a few dollars.
Can I just use a cheap tarp from the hardware store to save weight?
While tarp camping is a legitimate ultralight strategy, it is absolutely not recommended for beginners. A flat tarp offers zero protection from mosquitoes, ticks, spiders, or flowing ground water. Setting up a tarp to withstand heavy wind requires a deep knowledge of knots, wind direction, and site selection. Stick to a fully enclosed double-wall tent until you have significant trail experience.
Should I divide the tent weight with my hiking partner?
Absolutely. One of the greatest advantages of a 2-person or 3-person tent is that you can split the load. One person carries the inner tent body and the stakes, while the other person carries the waterproof rainfly and the poles. This evenly distributes roughly 2.5 pounds to each backpack, making the climb significantly easier for both of you.
Setting Yourself Up for Trail Success
The wilderness is unpredictable, but your shelter should never be. Finding the best backpacking tent for beginners is simply about choosing the gear that removes friction from your outdoor experience. By prioritizing a freestanding, double-wall, aluminum-pole structure in the two-person size class, you bypass almost every frustrating hurdle that causes new hikers to quit the hobby.
Take the time to practice setting up your new tent in your living room or local park before you ever hit the trailhead. Learn the satisfying snap of the poles, figure out which way the doors face, and practice rolling it back into its stuff sack. Once you trust your shelter, the anxiety of sleeping outdoors fades away, leaving you completely free to enjoy the quiet woods, the crackling camp stove, and the incredible feeling of carrying everything you need to survive right on your back.